
RC Servo Mini-Guide
Last modified by Eric Nantel on 2023/01/20 11:38
| Servo
Mini-Guide
Updated 09/15/2009 |
|
| Figure 1
illustrates a typical standard-size servo with its output horn (the round
white part) at center position. You will always use the indicated holes
for making mechanical connections. This is done with #2 self tapping
screws. It's not necessary to drill the holes but if you want you can
drill them with a 1/16" drill bit to make them easier to install.
Every servo we have ever tested has had the servo horn already positioned like this. However we instruct you to set the servo to mid position to verify the servo horn is in this position during the assembly process. This ensures each servo will have the same range and throw in the final assembled robot. The servo horn has 24 teeth on the spline. This means it can be removed and reinstalled in 15° increments. (360° divided by 24 equals 15°.) |
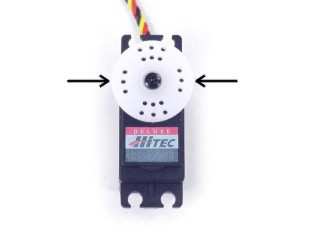 Figure 1. |
| Some assembly guides will require the servo horn to be rotated 90°. Unscrew the center screw on the horn, take care not to rotate the horn as you remove it, then install it as shown in Figure 2. If you think you may have messed it up, you can position the servo back to mid position following the steps in this tutorial, then install the servo horn so it looks like the image. If it doesn't line up exactly like the image, just install it to be as close as possible. |  Figure 2. |
| If you are using the aluminum servo horns you can unscrew the center screw on the horn, take care not to rotate the horn as you remove it, then install the aluminum one so it is in the same position as shown to the right. If you think you may have messed it up, you can position the servo back to mid position following the steps in this tutorial, then install the aluminum servo horn so it looks like the image. If it doesn't line up exactly like the image, just install it to be as close as possible. | 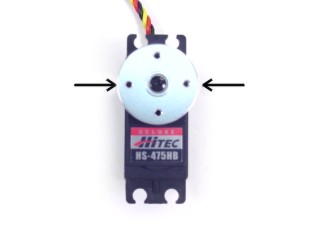 Figure 3. |
| Figure 4 shows an example of the parts that are included with some servos from the manufacturer. These parts are not used in the assembly of our kits, but we pass them along to you anyway. | 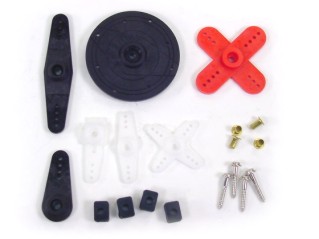 Figure 4. |