
Light-Weight Wrist Rotate Assembly Guide
Light-Weight Wrist Rotate Assembly Guide
Updated November 18, 2008
Safety first! Wear eye protection and never touch a powered robot!
Note: Loctite or thread locks can be used on aluminum components. Do not use on Lexan — not necessary and may cause damage.
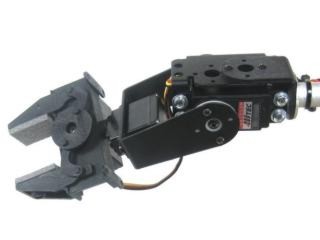
Complete arm.
Remove the gripper assembly from the "C" bracket. Remove the Little Grip from the Little Grip Connector. Set the "C" bracket and Little Grip Connector Lexan aside — they will not be used with the wrist rotate.
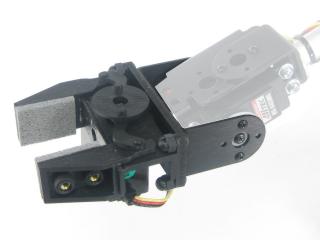 Figure 1.
Drop the HS-85BB into the wrist rotate bracket from the top as shown. Refer to the attachment diagram below. Make sure the servo is in center position and remove the servo horn — be careful not to turn the servo shaft.
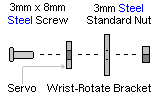
Bracket attachment diagram.
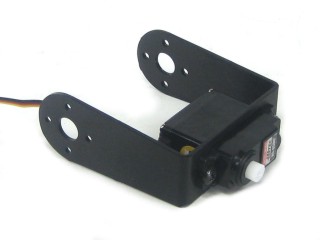 Figure 2.
Attach the Little Grip to the HS-85BB servo as shown. Push it onto the servo and secure with the servo horn screw. Tighten snugly.
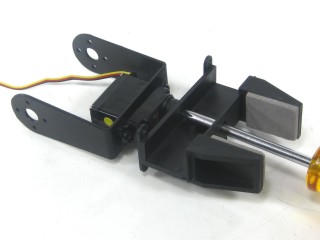 Figure 3.
Align the HS-422 servo to mid-position with the gripper halfway open. Remove the servo screw and horn. Slide the servo into the gripper from the bottom — wiggle slightly if needed to seat properly. Replace the servo screw, tighten down, then unscrew half a turn. Too much friction can bind the servo.
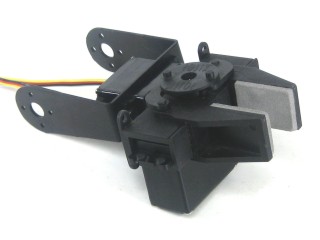 Figure 4.
Slip the gripper assembly back onto the arm assembly and attach with two #2 x .250" tapping screws. Add a 6" or 12" extender cable (or both if necessary) to the wrist rotate servo and plug into channel 5 on the SSC-32. Use wire ties to tidy up the wires.
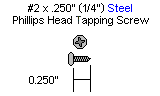 Figure 5.