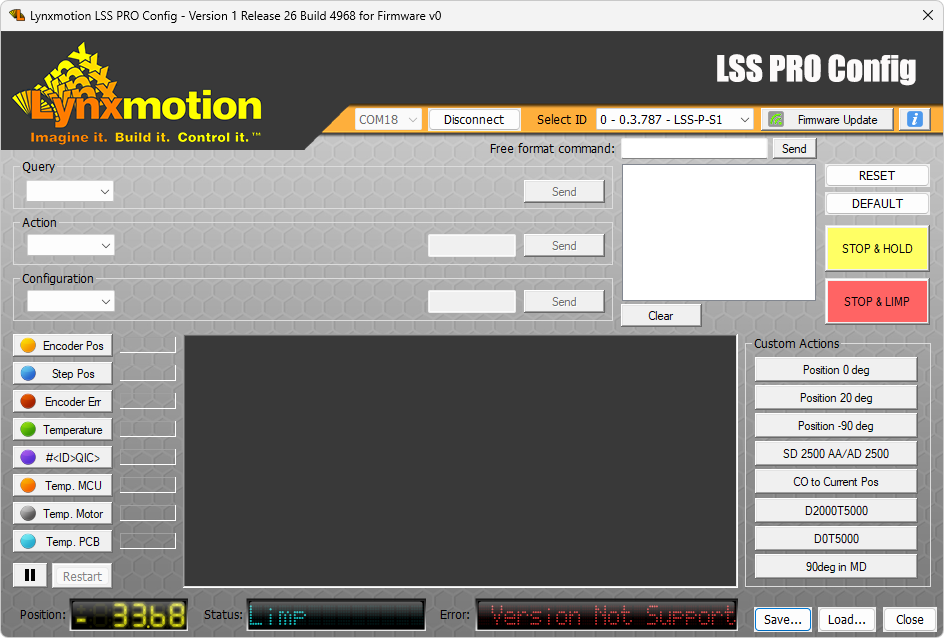
LSS-PRO Configuration Software
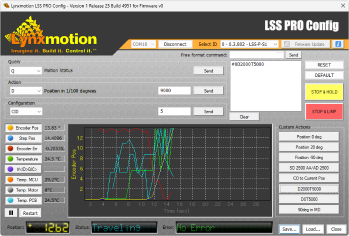

Table of Contents
Description
The Lynxmotion Smart Servo PRO Configuration Software (“LSS PRO Config” for short) is intended to be a tool to quickly interact with the Lynxmotion Professional Smart Servos (LSS-P) loaded with our Lynxmotion firmware. Features include sending action and configuration commands, queries (and receiving the reply), updating the firmware, monitoring sensor data and more. The software works on Windows 7 operating systems and above.
Note: The software can be connected to multiple servos, but the interface can only control and communicate with one at any time (unless using the free format commands described below). Each servo must have a unique ID. The servo(s) must be powered correctly and connected to the computer via USB from the first servo in the BUS.
Features
- Send action, configuration and query commands to an individual PRO servo
- Obtain visual feedback from various onboard sensors
- Create custom actions for testing purpose
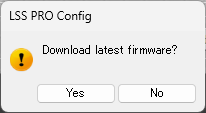
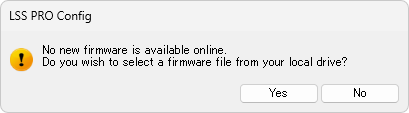
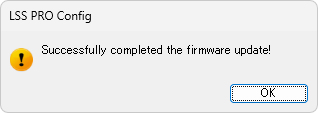
- Update PRO servo’s firmware
- Auto-Update if connected to Internet
User Guide
[lorren Ipsum]
Information

- The Information (capital I) button at the top right of the interface leads to this user guide.
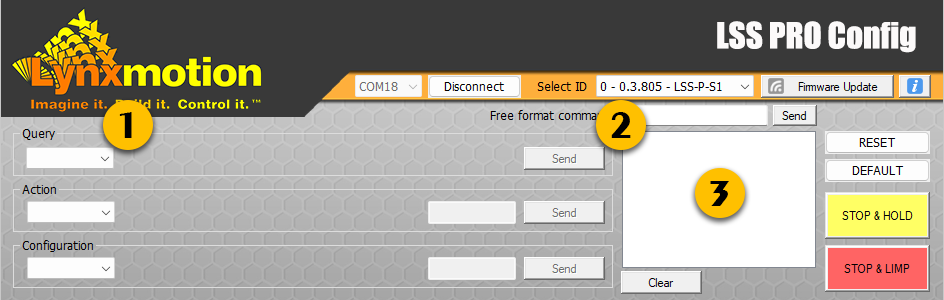
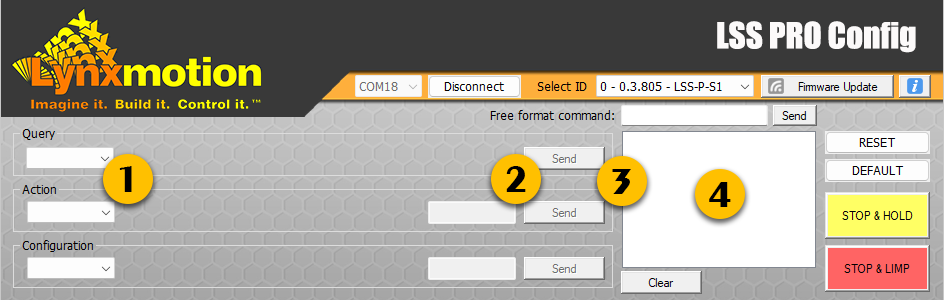
Connection
In order for the LSS PRO Config software to detect the servos, the correct USB to serial drivers must be installed on the computer. Windows will automatically detect and install the drivers.

- Select the appropriate COM port
- Click on the "Connect" button (All servos in the communication BUS should be detected)
- Select a particular servo from the list
Note: The interface will then display and control that single actuator.
Status

This is a section to directly give information to the user on what's happening with their actuator.
- Position of the actuator including any adjustment to the Origin Offset.
- Status of what the actuator is currently doing. (A list of the different statuses is available HERE)
- Errors that are happening. (A list of the different errors is available HERE)
Note: Most errors will require the problem to be solved & the servo either Reset or set Limp.
Servo Control
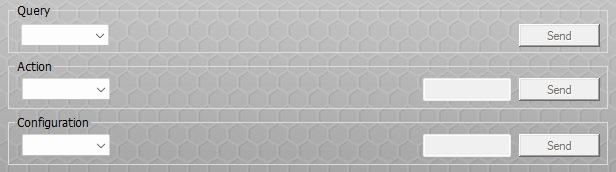
In order to view the various commands available for each drop-down, a PRO servo needs to be properly connected to the computer, powered, turned on and detected
Query
The drop down list below Query provides a list of most query commands possible.
- Use the drop down menu to select the available Query. A quick explanation is provided in text but for more information click HERE.
- Click the "Send" button to initiate the Query.
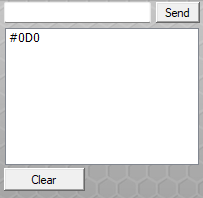
- The Query protocol command will be displayed here as well as the answer from the actuator. (ex: #1QID / *1QID1)
Action
The drop down list below Action provides a list of most action commands used with the LSS PRO servos.
- Use the drop down menu to select the available Action. A quick explanation is provided in text but for more information click HERE.
- Input the value of the Action required in the text input field. (ex: 9000 for a 90deg move)
- Click the "Send" button to initiate the Action.
- The Action protocol command will be displayed here and the actuator should be doing it.
Configuration
The drop down list below Configuration provides a list of most configuration commands used with the LSS PRO servos.
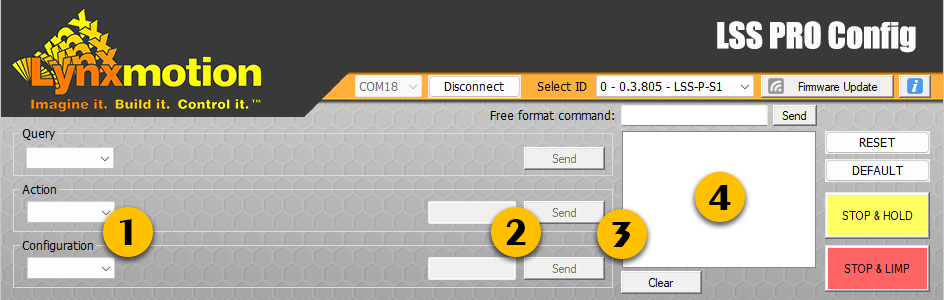
- Use the drop down menu to select the available Configuration. A quick explanation is provided in text but for more information click HERE.
- Input the value of the Configuration required in the text input field. (ex: 1 for an ID change to 1)
- Click the "Send" button to initiate the Configuration.
- The Configuration protocol command will be displayed here.
Free format command
This command line interface allows the user to send commands, including those not otherwise found in the drop-down list, as well as any special commands provided by Lynxmotion staff. Once sent the commands will be displayed in the area bellow (like a terminal) and can be cleared if required.
Telemetry
A graph within the software is used to display output of any query commands, which can include sensor data or calculated data.
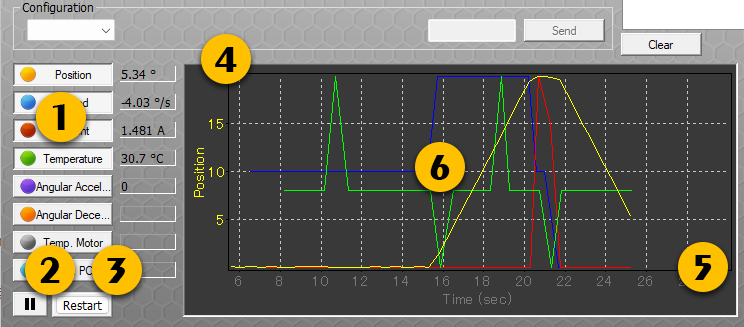
- To activate a specific value, click on the button and click again to disable it. he software start memorizing the data as soon as one query is activated.
- Pause will stop recording until you click back on it.
- Restart will wipe all the recorded values.
- The Y-axis of the graph auto-scales depending on what output is selected. To switch between traces, use the mouse wheel and confirm that the y axis label is the one you selected.
- The X-axis display the time & expands up to 20 minutes then scrolls a 20 minute time window.
- Saving the data is possible by doing a right click on the graph and select Copy, it's then possible to paste them in a spreadsheet application (Excel / Google Sheets)
Personalize Query
To change the query for a specific button, you have to do a "CTRL + CLICK" on the desired button, this interface will then be displayed.
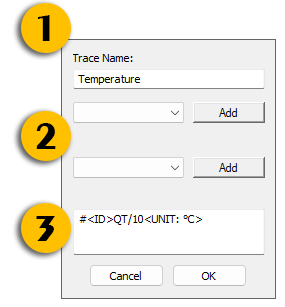
- Trace Name: Displayed name for that particular query.
- Two separate "Add" button and drop down are present, they are shortcuts to add to the query bellow.
- Query that will be sent to the actuator plus displayed units for the interface.
Saving Data
Custom Actions
This list of assignable buttons allows the user to select specific commands to send to the servo. These can be used to quickly position the servo to specific angles, experiment with different speeds and more.
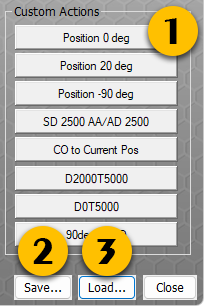
- All of those buttons can be set to trigger any action required.
- Save will let you do a backup of the current Custom Actions.
- Load will let you select and load a previously saved Custom Action file.
Personalize Action
To change the Action for a specific button, you have to do a "CTRL + CLICK" on the desired button, this interface will then be displayed.
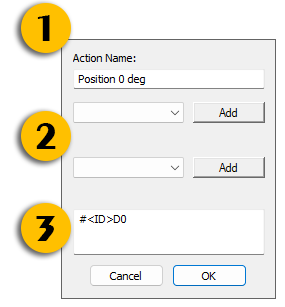
- Action Name: Displayed name for that particular action.
- Two separate "Add" button and drop down are present, they are shortcuts to add to the action bellow.
- Action command that will be sent to the actuator plus displayed units for the interface.
Firmware Update
[lorren Ipsum]