AL5 Programming Tutorial - PS2 & BotBoarduino
| AL5 Programming Tutorial - PS2 RC Rev. 1. Updated 01/11/2012 Safety first! Wear eye protection and never touch a powered robot! The purpose of this guide is to set up the robot arm to be controlled via a Playstation 2 game controller. Note, the PS2 control programs have been verified to work with Lynxmotion wireless controllers. We cannot guarantee that non-Lynxmotion controllers will work. What you'll need to get started:
|
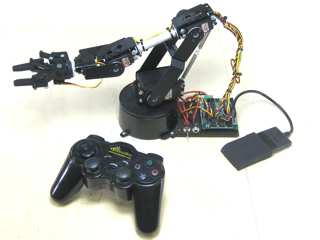
 Image of arm. |
||||||||||||||||||||||||||||||||||||||||||||||||||||||
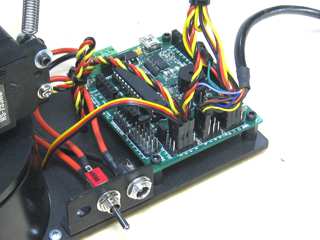
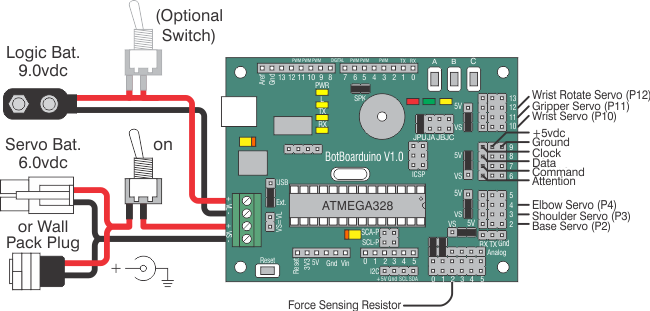
| Step 1. Install the BotBoarduino as shown in Figure 1. Wire the board as shown in the schematic and table below. Make sure the jumpers are all correct. |
 Figure 1. |
||||||||||||||||||||||||||||||||||||||||||||||||||||||
| Step 2. Configure the BotBoarduino as illustrated in Table 2. For more information about setting up the force sensing resistor, look here. |
|
||||||||||||||||||||||||||||||||||||||||||||||||||||||
| Schematic. Double check your connections against the schematic below. Note: You can check your PS2 cable's colors and the functions they represent here.
|
|||||||||||||||||||||||||||||||||||||||||||||||||||||||
Step 3. Open the .ino file in the IDE and locate the section of code to the right located near the top of the file. Remove the comments (double forward slash) from in front of the arm you are using. For example, if you are using an AL5D, the text should look like Table 3. The code is set to default to the AL5D arm. If you use another arm, be sure to add a comment before the AL5D line. If you are using a FSR on the gripper, be sure to uncomment the line "#define FSRG". When you are finished, save your program and click "Program." |
|
||||||||||||||||||||||||||||||||||||||||||||||||||||||
| Step 4. Consult Table 4 for information on controlling the arm. |
|
||||||||||||||||||||||||||||||||||||||||||||||||||||||


