
06 - Setup
Version 48.1 by Eric Nantel on 2021/11/08 15:37
Radio Control (RC) Mode
| 1. Set the Sabertooth DIP Switches for your needs | |||
| Sabertooth 2 x 12A Standard | Typical Setup | ||
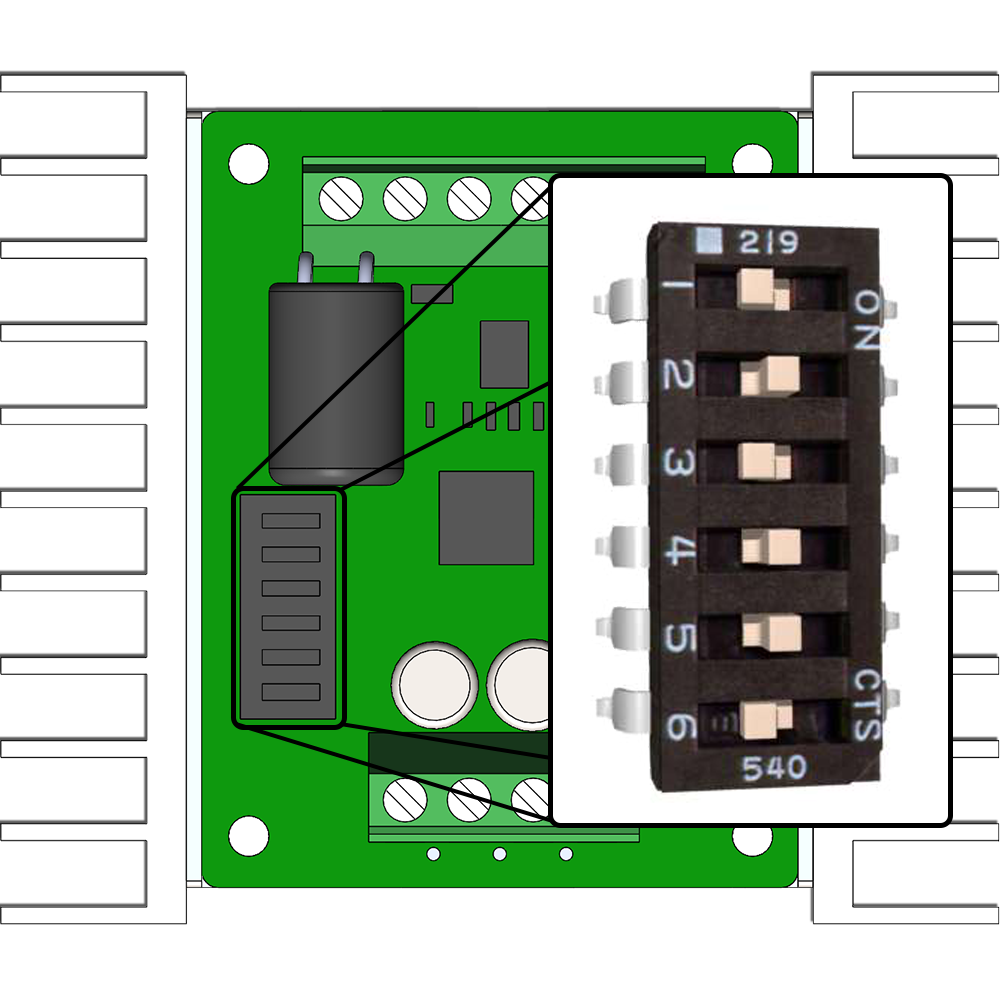 | 1 | OFF (Enable RC Mode) | |
| 2 | ON (Enable RC Mode) | ||
| 3 | OFF (Lithium Battery Mode) | ||
| 4 | ON (Enable Mixing Mode) | ||
| 5 | ON (Disable Exponential) | ||
| 6 | OFF (Disable Timeout) | ||
| Sabertooth 2x12 - Dip Switch Wizard | |||
| Sabertooth 2x12 - User Guide | |||
| 2. Connect the battery | |||
| 3. Enjoy | |||
Microcontroller / Autonomuous
| 1. Set the Sabertooth DIP Switches for your needs | |||
| Sabertooth 2 x 12A Standard | Typical Setup | ||
| 1 | OFF (Enable RC Mode) | |
| 2 | ON (Enable RC Mode) | ||
| 3 | OFF (Lithium Battery Mode) | ||
| 4 | ON (Enable Mixing Mode) | ||
| 5 | ON (Disable Exponential) | ||
| 6 | OFF (Disable Timeout) | ||
| Sabertooth 2x12 - Dip Switch Wizard | |||
| Sabertooth 2x12 - User Guide | |||
| 2. Connect the Sabertooth to your Microcontroller | |||
| Sabertooth #1 | |||
| S1 | Digital Pin #3 | ||
| S2 | Digital Pin #5 | ||
| Sabertooth #2 (if used) | |||
| S1 | Digital Pin #6 | ||
| S2 | Digital Pin #9 | ||
| 3. Load the microcontroller with Code | |||
| Lynxmotion GitHub - Arduino A4WD3 Examples | |||
| 4. Connect the battery | |||
| 5. Enjoy | |||