
LSS - Configuration Software
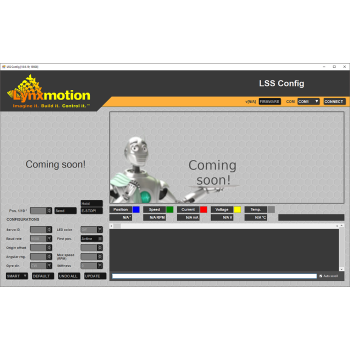
Table of Contents
{Work in Progress}
The beta version of the LSS Config is available here (password = beta). More features coming soon! ![]()
The LSS Configuration software ("LSS Config" for short) is intended to provide easy access to the main features and functionality of the Lynxmotion Smart Servo Motors, as well as providing access to firmware updates.
NOTE: Only one servo should be connected to the software at any time. The servo must be powered correctly and in serial mode. Should your servo NOT be in serial mode, please refer to the button menu.
Header

Connection
Connection to the servo is done automatically, via any properly installed USB to serial interface like the LSS Adapter board. Ensure the board is recognized by the computer and if not, install the proper drivers. The software automatically scans all standard baud rates using ID254 (broadcast ID) and waits for a reply from the servo connected. Should an incorrect COM port be selected, the software will keep trying to connect. You must disconnect, select the correct COM port and reconnect. If you are not sure which COM port to select, in Windows, go to Device Manager -> Ports (COM & LPT) and select the port associated with the USB to serial device.
Firmware Update

The LSS Config serves as the main software to update the servo's onboard firmware / programming. An internet connection is needed in order for the software to check if an online update is available.
The servo's current firmware version is displayed to the left of the FIRMWARE button. Pressing the button will open a popup window which allows you to select the firmware version to upload to the servo.
When checked, the Exp. button will allow experimental versions of the firmware to be displayed in the list. It also allows to load directly from a local file.
Once the OK button is pressed, a progress bar will be displayed in the command line. Do not disconnect the servo during a firmware update. If the process does get interrupted, you can still upload firmware to the LSS by going into bootloader mode by holding the button at power up.
Servo Control [coming soon]
The servo control section allows you to visually move the servo and change a variety of parameter.
The large red STOP button will send a LIMP command to the servo.
{More to come}
Configurations
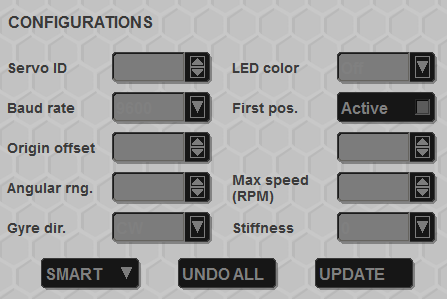
Upon connection, the software will read all configuration values and update the values in the "configurations" section. Visit the LSS Communication Protocol page for more information about commands, actions and configurations.
Changing the values will not affect the session. Values which have been changed will have a yellow background. The values which can be entered are restricted to what the servo can accept; for example, servo IDs must be below 250.
UPDATE Pressing this button will write all values to EEPROM, changing the configurations, and reverting all background colors to white.
UNDO ALL is a shortcut button which reverts all changes made which have not been written to EEPROM.
SMART / RC POS / RC WHL: This is a shortcut to change the servo's mode (LSS Smart Serial / RC PWM Position / RC PWM Wheel). IMPORTANT NOTE: Should you select either of the two RC modes, the LSS Config software will no longer be able to communicate with the servo. You must use the button menu to return to LSS serial mode (hold the button, release, press twice).
Telemetry Graph [coming soon]
The sensor graphing feature of the software allows you to select, display and record, with respect to time, the output from all of the servo's sensors.
{More to come}
Command Line

The custom command line interface both allows you to communicate directly with an individual servo, send commands to it (and view replies), as well as get responses to queries from the software.
>>: Command sent to the servo
<<: Reply from the servo
The software also auto-completes each command by automatically inserting "#[ID] before each command. For example, rather than typing #4D230<cr>, you need only type D230 and the software will automatically add #4
Left clicking a line highlights that line and allows it to be copied to the clipboard by pressing the right mouse button.
{More to come}