| Viper
Online Assembly Instructions.
Microcontrollers
Safety first! Wear eye protection and never touch a powered robot!
|
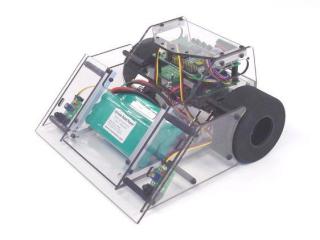
Viper |
| |
1. OOPic-R
/ Dual H-Bridge
Step 1. Remove the middle section of the shelf. Use four
4-40 x 3/8" screws from the bottom and four 3/4" spacers to
secure the Dual H-Bridge to the shelf. Make sure that the screw terminal
blocks are oriented to the front of the shelf; it has the round power
switch hole in it.
4 x 
|
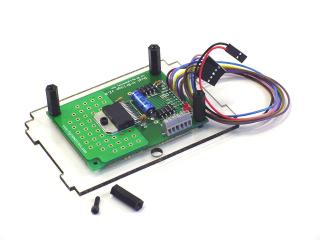
Figure 1-1. |
| |
| Step 2.
Align the OOPic-R so that the serial connector is pointing out toward the
back of the shelf, and use four 4-40 x 1/4" screws to hold it in
place.
4 x 
|
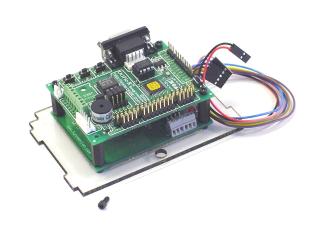
Figure 1-2. |
| |
2. Bot Board /
Dual H-Bridge
Step 1. Remove the middle section of the shelf. Use four 4-40 x
3/8" screws from the bottom and four 3/4" spacers to secure the
Dual H-Bridge to the shelf. Make sure that the screw terminal blocks are
oriented to the front of the shelf; it has the round power switch hole in
it.
4 x
|
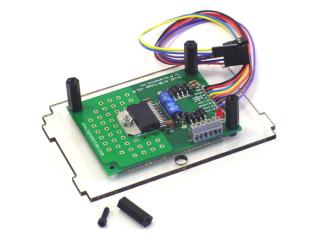
Figure 2-1. |
| |
| Step 2.
Align the Bot Board so that the serial connector is pointing out toward
the back of the shelf, and use four 4-40 x 1/4" screws to hold it in
place.
4 x
|
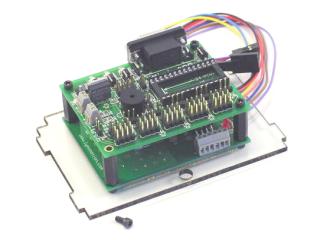
Figure 2-2. |
| |
3. Bot Board /
Scorpion
Step 1. Use four 4-40 x 3/8" screws and four 3/4" spacers
to make a stand for the Bot Board.
4 x
|
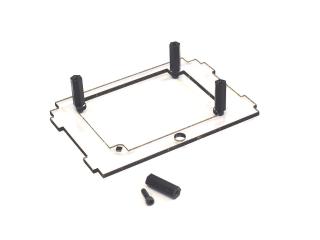
Figure 3-1. |
| |
| Step 2.
Align the Bot Board so that the serial connector is pointing out toward
the back of the shelf, and use four 4-40 x 1/4" screws to hold it in
place.
4 x
|
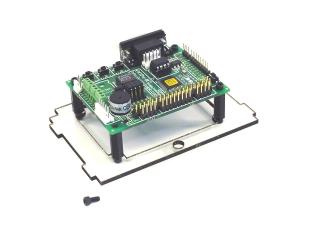
Figure 3-2. |
| |
Step 3.
You can tuck the Scorpion away in the body where the motors are; just be
careful to not let the exposed pins touch the motors! A little
double-sided foam tape should be more than enough to keep the Scorpion in
place.
An alternate method would be to leave the center panel in the shelf. Then
mount the Scorpion there, using whatever method works best for you.
Note: A piece of aluminum has been added to the Scorpion in the picture as
a heat sink. |
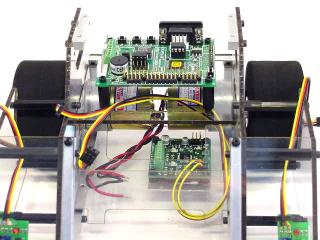
Figure 3-3. |
